nps的Github地址:https://github.com/ehang-io/nps/
使用说明:https://ehang-io.github.io/nps/#/
一、配置
1.登录Ubuntu服务器
2.下载nps服务端
root@VM-8-4-ubuntu:/home/lighthouse#wget https://github.com/ehang-io/nps/releases/download/v0.26.10/darwin_amd64_server.tar.gz3.创建nps_server文件夹并解压
root@VM-8-4-ubuntu:/home/lighthouse#mkdir nps_server
root@VM-8-4-ubuntu:/home/lighthouse# tar -xzvf linux_amd64_server.tar.gz -C nps_server
4.进入conf文件夹并修改nps.conf配置
appname = nps
#Boot mode(dev|pro)
runmode = dev

#HTTP(S) proxy port, no startup if empty
http_proxy_ip=0.0.0.0
http_proxy_port=80
https_proxy_port=443
https_just_proxy=true
#default https certificate setting
https_default_cert_file=conf/server.pem
https_default_key_file=conf/server.key

##bridge
bridge_type=tcp
bridge_port=[桥接的端口号]
bridge_ip=0.0.0.0

# Public password, which clients can use to connect to the server
# After the connection, the server will be able to open relevant ports and parse related domain names according to its own configuration file.
public_vkey=[公钥密码]

#Traffic data persistence interval(minute)
#Ignorance means no persistence
#flow_store_interval=1

# log level LevelEmergency->0  LevelAlert->1 LevelCritical->2 LevelError->3 LevelWarning->4 LevelNotice->5 LevelInformational->6 LevelDebug->7
log_level=7
#log_path=nps.log

#Whether to restrict IP access, true or false or ignore
#ip_limit=true

#p2p
#p2p_ip=127.0.0.1
#p2p_port=6000

#web
web_host=[腾讯云的外网IP或者域名]
web_username=[web页面登录用户名,默认为admin]
web_password=[web页面登录密码,默认为123]
web_port = [web访问端口,默认8080]
web_ip=0.0.0.0
web_base_url=
web_open_ssl=false
web_cert_file=conf/server.pem
web_key_file=conf/server.key
# if web under proxy use sub path. like http://host/nps need this.
#web_base_url=/nps
5.安装nps
root@VM-8-4-ubuntu:/home/lighthouse/nps_server# ./nps install6.开放服务器端口
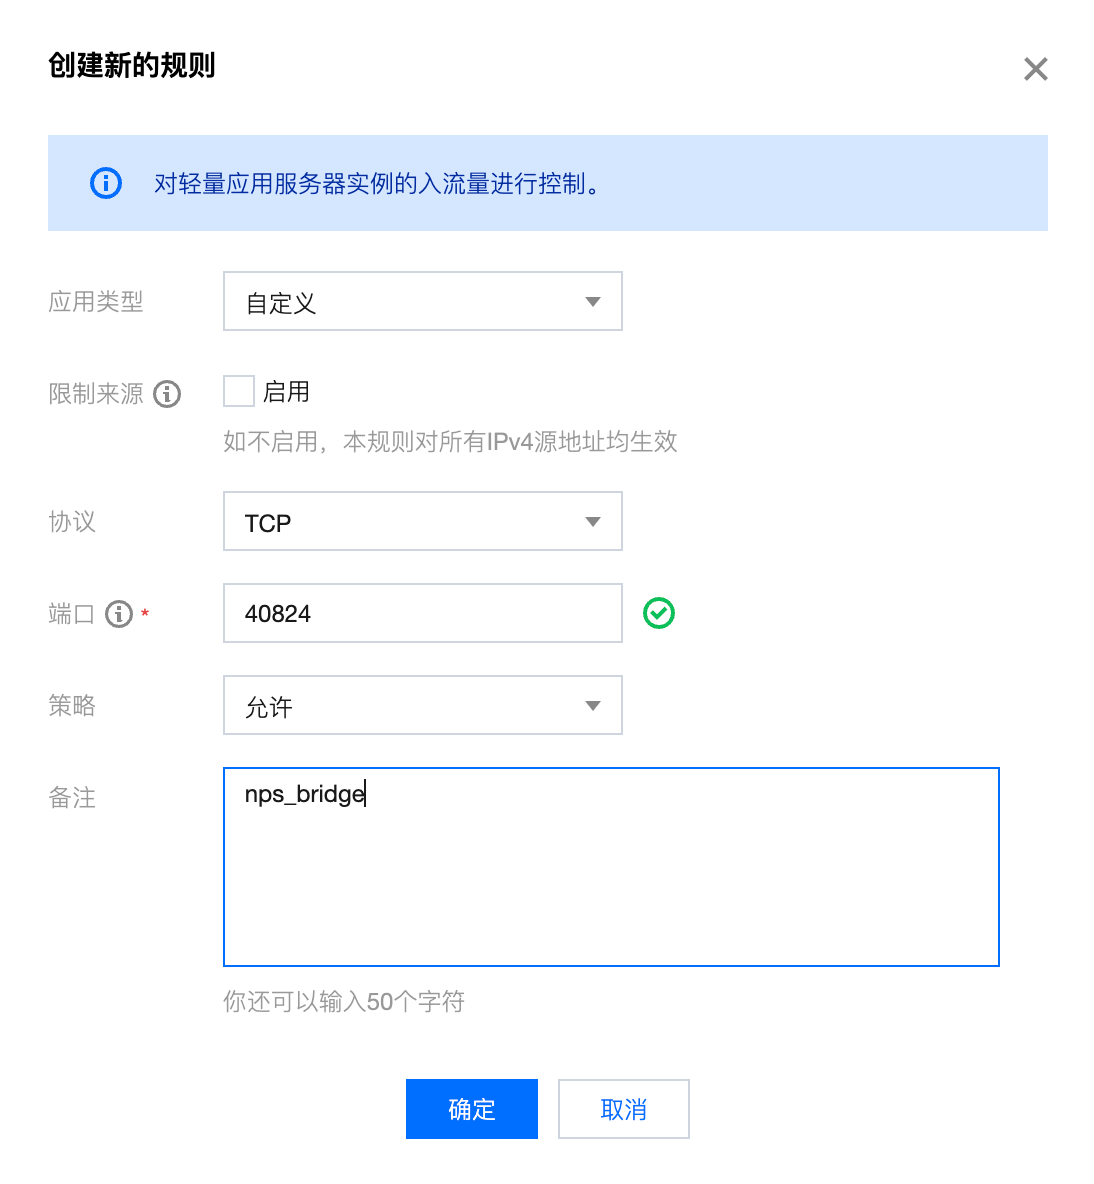
我的桥接端口号(bridge_port)端口为40824,web_port为8089,所以需要在腾讯云的防火墙将这两个端口进行开放,如图:

注意:如果在服务器使用了宝塔面板的话,需要在安全-》系统防火墙处添加端口规则进行开放;
7.启动或停止nps
root@VM-8-4-ubuntu:/home/lighthouse/nps_server# ./nps start
root@VM-8-4-ubuntu:/home/lighthouse/nps_server# ./nps stop
8.nps web配置
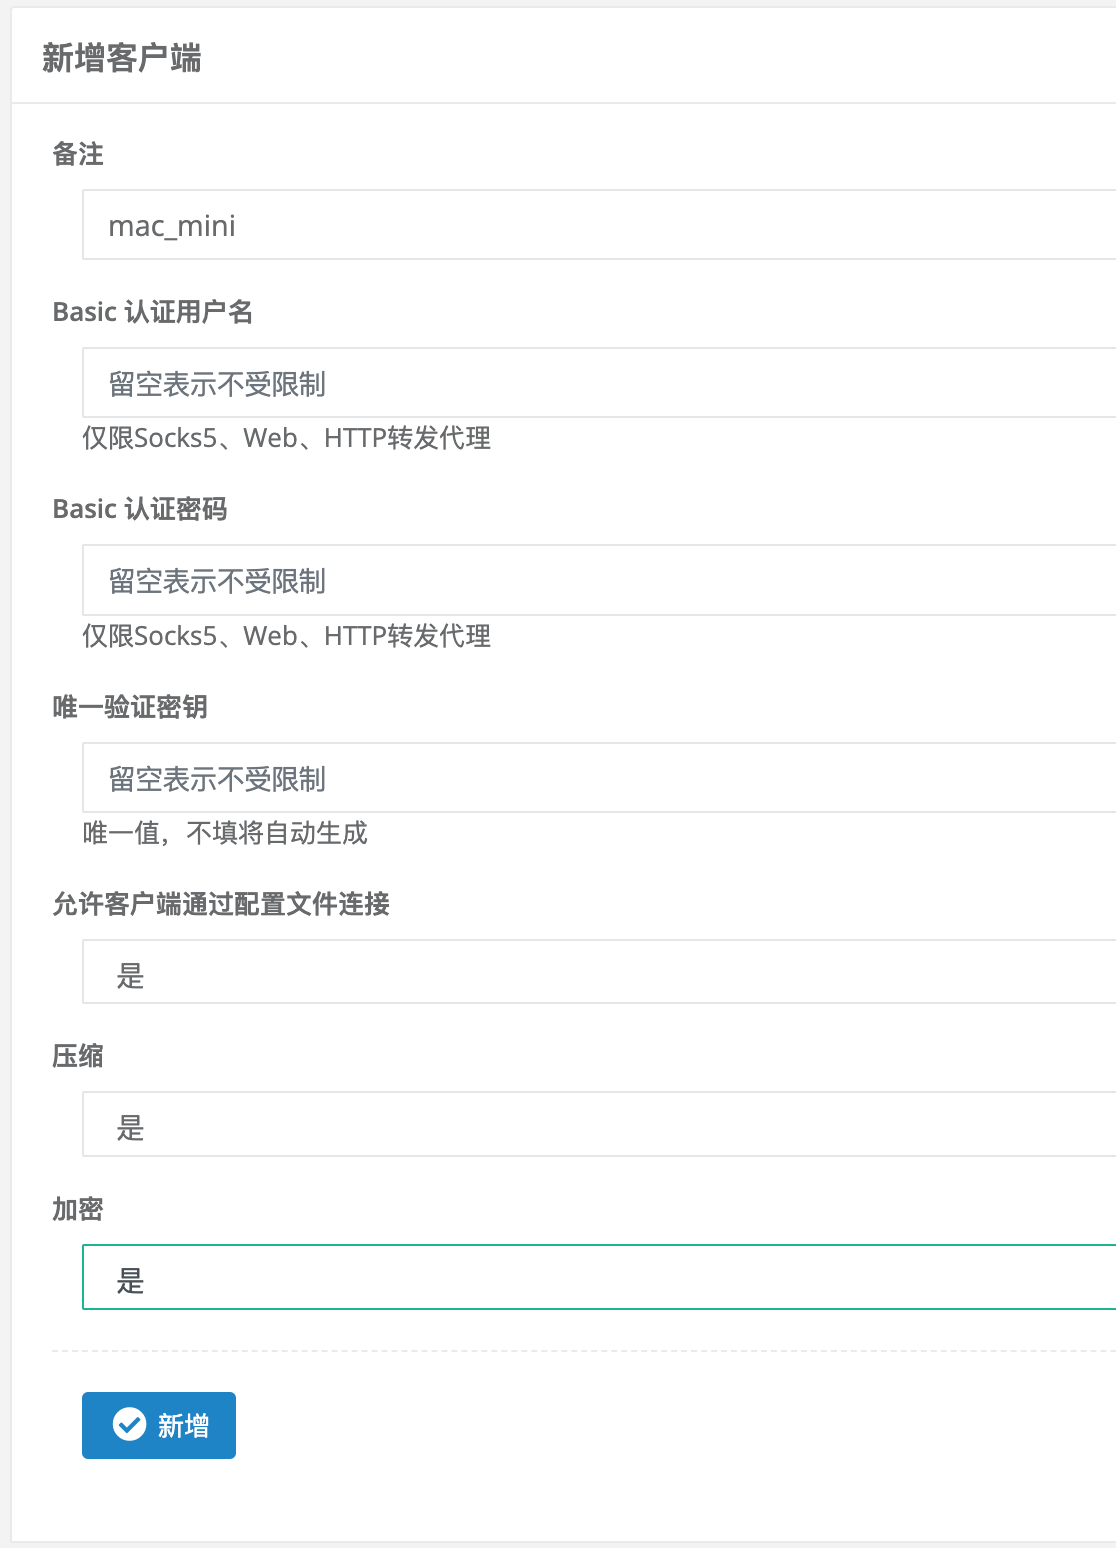
打开浏览器,进入[你的服务器IP:web_port]即可进入,点击左侧的客户端创建:

比如上面这个,我是将mac_mini作为客户端,可以将压缩和加密都勾选上。
创建之后客户端列表会显示出来:

上面有两个客户端,刚开始创建完时连接状态是离线的,然后在客户端上使用客户端命令启动npc;
9.下载npc客户端
进入https://github.com/ehang-io/nps/releases页面,找到对应的版本,比如我的Mac mini上是darwin_amd64_client.tar.gz,在Mac mini下载后解压,然后执行上面的客户端命令:
#./npc -server=服务器ip:48024 -vkey=秘钥 -type=tcp
# the version of client is 0.26.10, the core version of client is 0.26.0
#    Successful connection with server 服务器ip:48024
连接成功后出现上面成功连接的信息后回到服务端的web页面即可看到客户端连接在线的状态;
注意:如果你的客户端是M1的mac,可以自己编译或者从这里下载已经编译好的https://github.com/ehang-io/nps/issues/884
10.进行测试
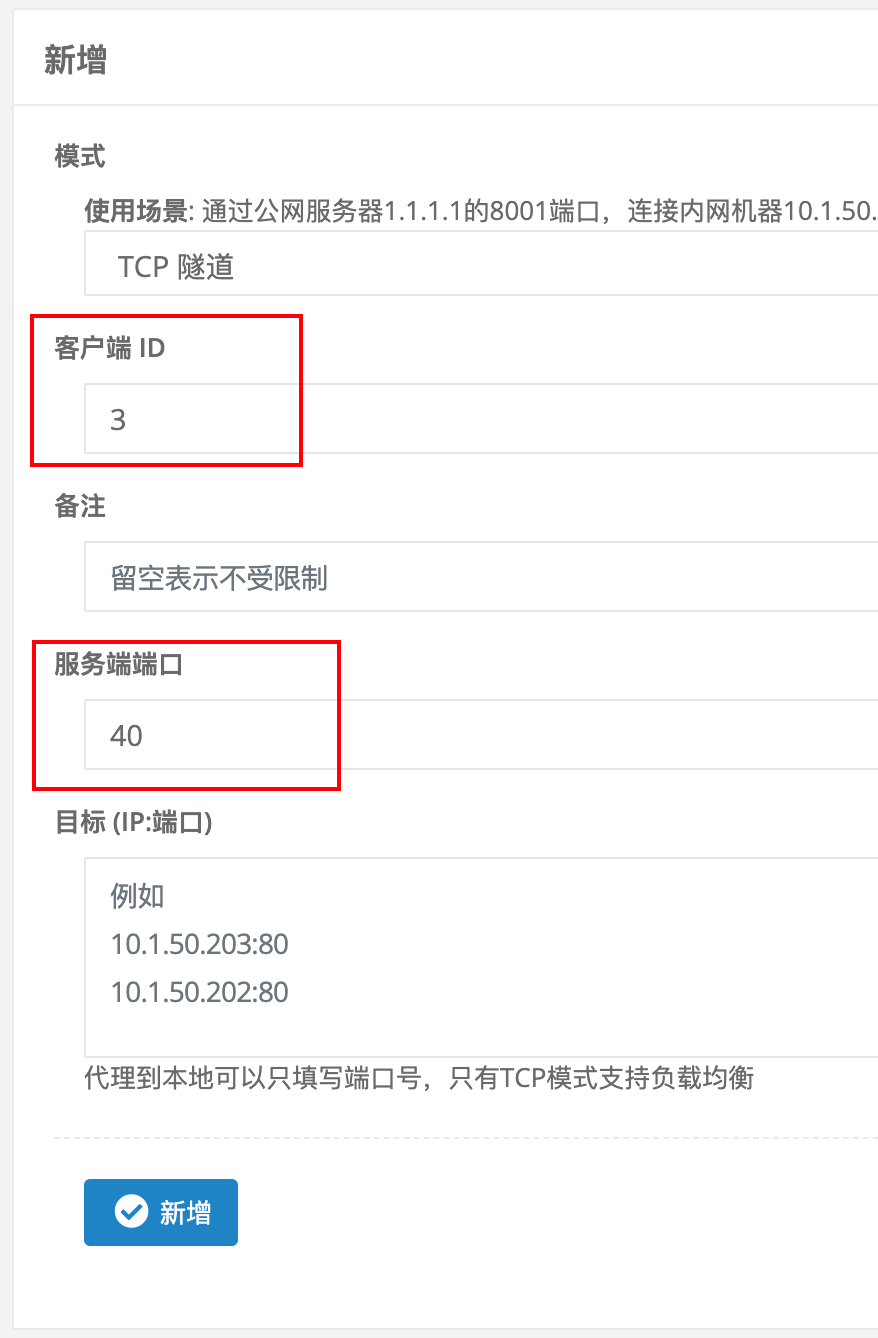
点击web页面的Tcp隧道,新增隧道,如图:

注意:
1. 客户端ID一定填上面客户端的ID,否则提示客户端ID不存在;
2. 服务端端口也要记得开放,否则会访问不到;
3. 目标IP和端口填写你的npc客户端所在的设备需要访问的服务,比如我的群晖是192.168.50.56:5000。
11.访问
在浏览器输入[服务器ip:服务端端口]后,就能访问到你局域网的设备了。
二、更进一步
1. 使用Docker进行配置
2. npc客户端自启动
3. 群晖配置
在Github的releases中下载spk群晖套件,例如npc_x64-6.1_0.19.0-1.spk,进入群晖选择手动安装,安装完成后启动npc客户端:

输入[服务器ip:端口]和秘钥,点击保存即可,然后再nps的web页面刷新即可看到客户端已经在线了。
三、默认端口
- Windows默认远程桌面端口为:3389
- Mac os默认vnc端口为:5900
- ssh默认端口为:22